
Thursday, 22 August 2013
Wednesday, 21 August 2013
Flo Jo Boutique Bristol
Do you always fall in between sizes?
I always find myself taking the maximum amount of garments allowed into the fitting room, just to hand it all back to an unimpressed lady that has to hang it all back up.
I've decided to do something about it.....Learn to sew my own clothes.
Yes, I'd class myself as a beginner, I have made a dress before, it was a while back, for an art project so I didn't have to fit it and it didn't matter if the hem wasn't straight.
I have this image in my head of gorgeous fitted couture style dresses that I'm going to make for myself. I know in reality I'm going to have to start at the beginning and take it slow.

Searching online I found this fantastic vintage style Boutique near me.
It's called Flo - Jo Boutique, a beautiful shop on Gloucester road that sells wonderful fabrics and patterns, they also have sewing classes available.
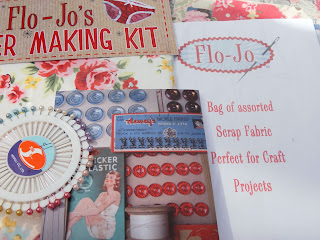
I may attend one, but for now, I bought a hand made knicker kit and a few little extras to get me started and build my confidence with the sewing machine.
Might I add the lady serving me was so friendly and helpful, I told her I was a beginner and she assured me if I need any help I could always call or pop back in.
I just adore that in a shop, excellent customer service is always a must for me when I am shopping, and they certainly ticked that box.
Have you been to this gem of a shop? Let me know below if you have, along with any links to posts on your latest Sewing projects.


I've decided to do something about it.....Learn to sew my own clothes.
Yes, I'd class myself as a beginner, I have made a dress before, it was a while back, for an art project so I didn't have to fit it and it didn't matter if the hem wasn't straight.
I have this image in my head of gorgeous fitted couture style dresses that I'm going to make for myself. I know in reality I'm going to have to start at the beginning and take it slow.

Image SOURCE and Site
Searching online I found this fantastic vintage style Boutique near me.
It's called Flo - Jo Boutique, a beautiful shop on Gloucester road that sells wonderful fabrics and patterns, they also have sewing classes available.
I may attend one, but for now, I bought a hand made knicker kit and a few little extras to get me started and build my confidence with the sewing machine.
Might I add the lady serving me was so friendly and helpful, I told her I was a beginner and she assured me if I need any help I could always call or pop back in.
I just adore that in a shop, excellent customer service is always a must for me when I am shopping, and they certainly ticked that box.
Have you been to this gem of a shop? Let me know below if you have, along with any links to posts on your latest Sewing projects.


Have you used this knicker making set? Don't forget to leave a comment and check back soon to see my finished hand made underwear.
Friday, 16 August 2013
Baby teething troubles?
Is your baby teething?

If you have read my About me page, you will know I have a wonderful little boy.
I feel truly blessed to have him in my life, here he is in the photograph above.
.....Dribbling away.... Teething.
(Photo taken by my brother, I always love his photography. He's currently on holiday, as soon as he's back he's going to teach me how to use my camera more effectively, so you'll hopefully see an improvement in my photographs. For now you will just have to put up with my Iphone snaps, Sorry.)
Well, if your a mum and reading this, you'll know teething isn't an enjoyable time. It can turn the happiest baby into a grizzly bear, so I thought I'd share my little boys favourite teething toy with you:
The Nuby BugaLoop

Click HERE for photo source and site
It's a brilliant product, I feel it really helps him as it is flexible and the beads/bugs have different textures. It's also very easy to hold.
He really enjoys having a good chomp on this, I think it has been the best teething toy I have purchased for him, at roughly £4 from Tesco it's worth every penny.
I have recommended this toy to several of my friends, so thought I would share this one with you too.

Hat: H&M
Wednesday, 7 August 2013
Build a baby / toddler wardrobe from £10 Ikea bookcase
Are you decorating on a budget? I sure am.
If you are and need a great little wardrobe at a fantastic price, why not use this for inspiration.
When I have a budget, I tend to be more creative, I find a way to get what I need without that price tag attached. I do my research and find inspiration from somewhere.
So today I wanted to get a mini wardrobe for my lovely little boy, well, his clothes really. I was fed up of having all of his tops in a drawer and just reaching for the top ones. There are always clothes underneath which I forget about, and as soon as the others are washed, they get folded up and put back on top again. So I thought it would be nice to have them hanging up.
From Ikea, I purchased the small white Billy bookcase for £10 and the 50cm Komplement rail or £2.
So, the thing I like about Ikea is that they have great instructions and things are so simple to put together.
I built the bookcase as instructed, cut the rail to the correct size, then marked out where I wanted my rail to go inside the bookcase.


Well, this is the end result with the shelves in, as you have seen above.
Feel free to use this as inspiration for your project if you're decorating. It's such a fantastic price at £12 to make, and you could always decorate it with stickers or paint.
you could do it even better and have two rails, although I only think you would fit skirts or short in the bottom because o the length.

If you are and need a great little wardrobe at a fantastic price, why not use this for inspiration.
When I have a budget, I tend to be more creative, I find a way to get what I need without that price tag attached. I do my research and find inspiration from somewhere.
So today I wanted to get a mini wardrobe for my lovely little boy, well, his clothes really. I was fed up of having all of his tops in a drawer and just reaching for the top ones. There are always clothes underneath which I forget about, and as soon as the others are washed, they get folded up and put back on top again. So I thought it would be nice to have them hanging up.
I gave myself a budget of £20 and this is what I came up with:
 |
An Ikea Billy bookcase converted with a rail.
Total: £12
(please excuse the pink wallpaper, I haven't got around to stripping that down yet.)
From Ikea, I purchased the small white Billy bookcase for £10 and the 50cm Komplement rail or £2.
So, the thing I like about Ikea is that they have great instructions and things are so simple to put together.
I built the bookcase as instructed, cut the rail to the correct size, then marked out where I wanted my rail to go inside the bookcase.
Here are a few photographs for tips on how You can achieve this:
Save money by looking in the IKEA & The environment section, this is where scrap wood from broken items gets left. This is always an excellent place to start if you are making things, you may find a few treasures here for free. Always put it in your car as soon as you spot, it because it will probably be gone when you get back.

Always get all your stuff ready before you start to put it together, its always handy to have things in reach, you'll get the job done much quicker. (Don't put the shelves in yet)

After Building the Billy Bookcase you can see what the width of your rail has to be, I made sure I marked it out clearly. Also I remember to mark the space for the plastic insert that holds it up as this takes of an extra couple of mm, as you can see, I first drew the line, then marked the width of two grey plastic holders so it will fit correctly. I used a saw that was ideal for metal, and also was careful to wear gloves as it will expose sharp metal. I then used some sandpaper to smooth the edge, popped the grey caps on the end and then got marking the bookcase.

Take in to consideration the shape of the hanger, I bought the children's hangers from Ikea, and they don't fit well when the rail is upright.

I chose to have the rail up the following way as I found the Ikea hangers fit on much easier, also the flat edge on the top made it easier to mark where the holes would be, for this I used a pen. Also I knew that because the Billy bookshelf is slightly small in depth the hangers would poke out of the front, so I made sure I put the hanger in and that it was not banging the back of the bookcase. This gave it a good fit, and ensured the clothes would hang correctly.

The screws for the Komplement rail are meant for the wardrobe range, these already have the holes drilled so the screws you get with this rail have a flat tip. this is useless for this task as I needed to screw it into the wood so I found some replacements from my spare screw pot. I made sure that it had a point on it, and also that it was the same size. If the screw was any longer it would go through the other side of the wood. Below on the right side if the photo is an example screw.

OK, This was the hardest part. I used a screwdriver to push where the holes where, this made an indentation for the screw to sit in.
(Honestly, the screw did go in straight, I was just using one hand taking photo so could not hold it)
I gradually screwed it in part of the way, then took it out, then once I had done this in each of the marked holes, I put the rail in. I did not want to use a drill as I didn't want it to go through the other side of the wood.

Well, this is the end result with the shelves in, as you have seen above.
Feel free to use this as inspiration for your project if you're decorating. It's such a fantastic price at £12 to make, and you could always decorate it with stickers or paint.
you could do it even better and have two rails, although I only think you would fit skirts or short in the bottom because o the length.

Related articles:
Subscribe to:
Posts (Atom)